IPv6 Tunnelling
Hurricane Electric (http://he.net) provides a free IPv6 “6in4” tunnel that works well with CeroWrt. This gives your router a globally routable IPv6 address so that you can directly connect to other IPv6 resources on the Internet. It’s straightforward to do this: first you create a free tunnel account through Hurricane Electric’s Tunnelbroker site (http://tunnelbroker.net) and then configure your CeroWrt router.
The Sample Script for IPv6 tunnel makes it easy to set up the tunnel once you have created your Tunnelbroker account. This procedure has been tested with the Modena 3.7.5-2 and newer builds.
NB: As of March 2013 (CeroWrt 3.7.5-2), the automatic re-establishment code of the 6in4 module appears not to be working. You will need to re-establish the tunnel manually (see Step 3 below) when your external IP address changes. Bug is being tracked here: #358
1. Create an IPv6 6in4 tunnel
- Go to the IPv6 Tunnel Broker site at http://tunnelbroker.net
- Register to create an account. After you’re logged in…
- Click the Create Regular Tunnel link (circled in Figure 1, below) You’ll see the “Create New Tunnel” page (Figure 2).
- Fill in the “IPv4 Endpoint (Your side):” field with your router’s external IP address. This is shown in the “You are viewing from:” line.
- Click the button that corresponds to the closest Tunnel Server. The page may suggest a server recommendation, as shown in the image. If so, use it.
- Scroll to the bottom of the page and click the “Create Tunnel” button. It will take a few moments (less than a minute) to create and register your new tunnel, and show the Tunnel Details page.
- The Tunnel Details page (Figure 3) shows everything you need to know about your tunnel:
* Your Tunnel ID and its creation date.
* A text field where you can fill in a human-readable name for the
tunnel
* The IPv6 Tunnel endpoints: both an IPv4 and IPv6 address for the
server (far) endpoint, and the IPv4 & IPv6 address for your end of the
tunnel.
* DNS resolver addresses (IPv4 & IPv6)
* Routed IPv6 prefixes for a /64 (single network) or /48 address.
* rDNS name servers for this block of addresses.
- You can click on any of the legends (“Tunnel ID”, “Routed /64”, etc.) to see more details.
You have now created the tunnel. (The Tunnel Broker home page lists all the tunnels that you have established.) Hurricane Electric is listening on their end, waiting to pass IPv6 traffic to and from your external address listed above. Now you need to configure the CeroWrt router to use the tunnel.
2. Configure CeroWrt to use the IPv6 Tunnel
- Stay on the Tunnel Details page of the Tunnel Broker web site.
- Click the Example Configurations tab (Figure 4) on the Tunnel Details page. This lists a number of configurations for common routers/operating systems.
- Select “OpenWRT Backfire 10.03.1” from the dropdown. You will see a set of commands listed.
- Use your favorite text editor to open the Sample Script for TunnelBroker tunnel .
- Use the values from the Tunnelbroker web page to fill in the corresponding values in the script. Save the text to file in /tmp and execute the script.
- The full procedure for saving and executing the script is described at the top of the script file.
3. Manually re-establish the tunnel when your IPv4 address changes
If you do not have a static IPv4 address for the client end of the tunnel (perhaps you have a DSL or cable modem connection), your tunnel will go down each time your external IPv4 address changes.
The Tunnel Broker has a facility for re-registering your current client IPv4 address. The page at https://ipv4.tunnelbroker.net/ipv4_end.php has details. As a quick fix, you can visit the URL below to inform the Tunnel Broker to update your TUNNELID to autodetect your IPv4 address:
https://USERNAME:PASSWORDipv4.tunnelbroker.net/ipv4_end.php?tid=TUNNELID@
or use the non-HTTPS URL described in the script below. If the update goes properly, you see a response similar to this:
+OK: Tunnel endpoint updated to: 123.45.67.89
Sample Script for setting up Tunnelbroker Tunnel
The tunnelbroker.sh script sets up a tunnel using the configuration
parameters provided by the Hurricane Electric Tunnelbroker.net site. As
of CeroWrt 3.10.50-1, this script is pre-installed in
/usr/lib/CeroWrtScripts
The script is also available as part of the CeroWrtScripts bundle on GitHub: https://github.com/richb-hanover/CeroWrtScripts/blob/master/tunnelbroker.sh
Update: On 17Nov2014, the CeroWrtScripts on github were updated to fix a problem with supplying the correct username. Read the tunnelbroker.sh script for more details. The version of the pre-installed script in CeroWrt 3.10.50-1 does not contain this fix: edit the file manually to use the correct username - your plain UserID.
Screenshots
The screenshots below illustrate the process of setting up a TunnelBroker account at HurricaneElectric.net
Figure 1: Main Page, showing Create Regular Tunnel link

Figure 2: Create New Tunnel page
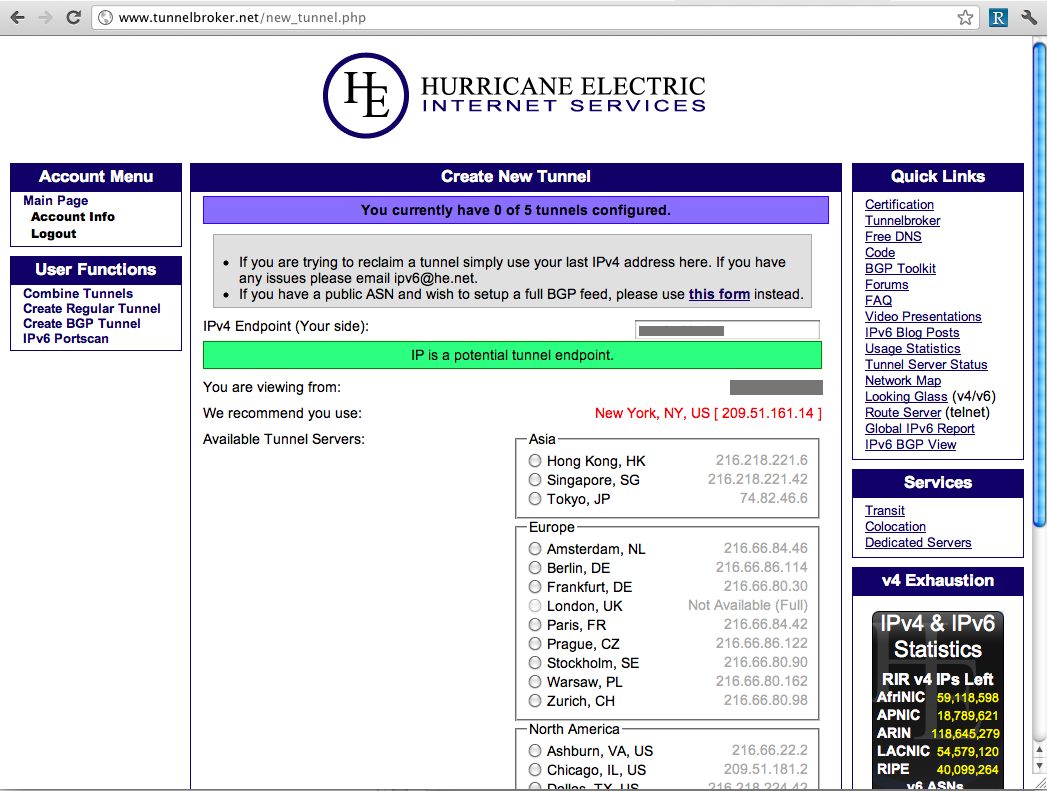
Figure 3: Tunnel Details page
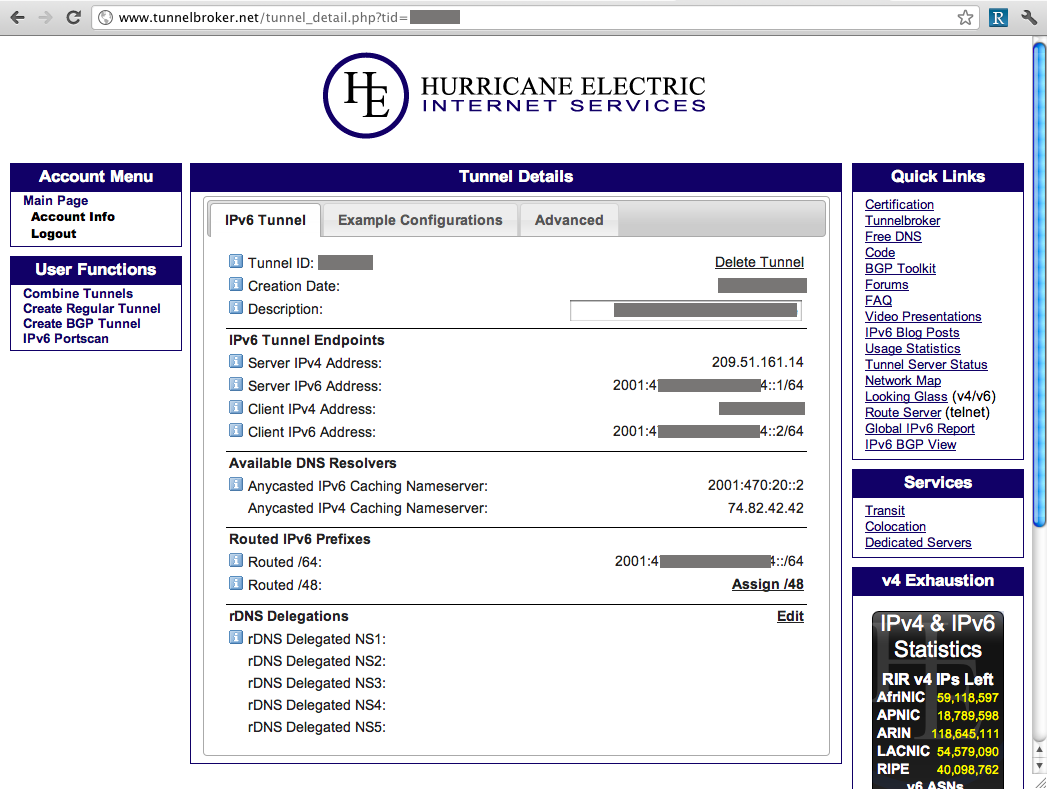
Figure 4: Configuration script for CeroWrt and OpenWrt
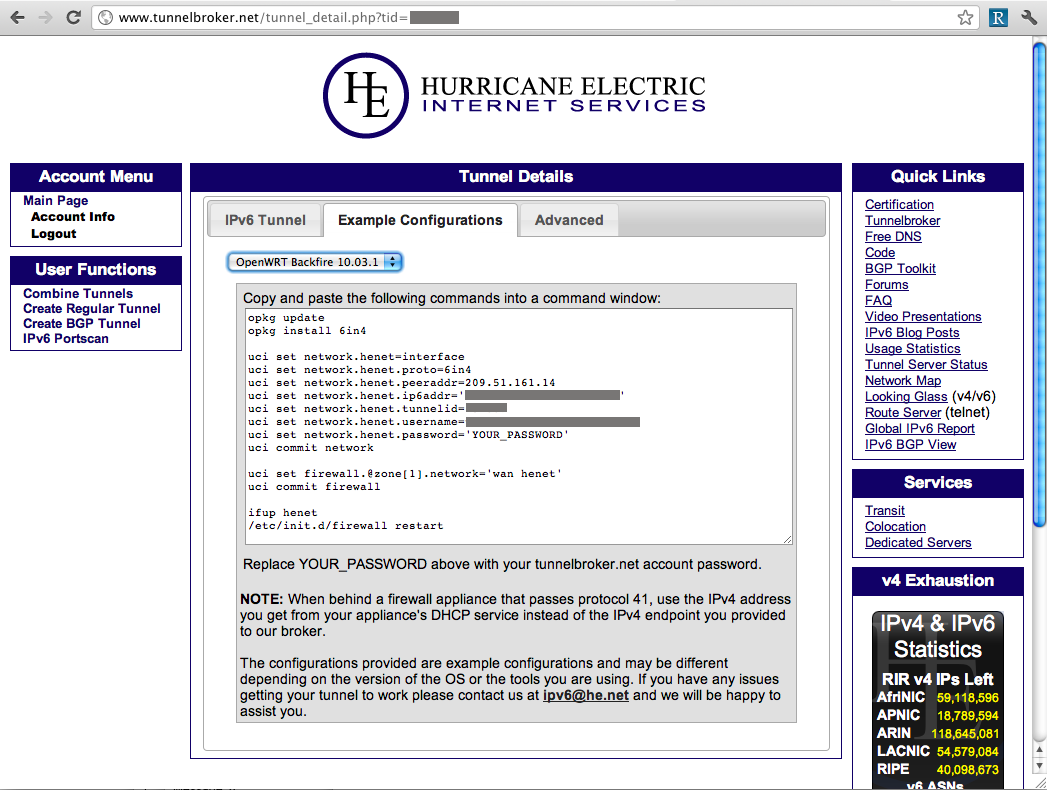
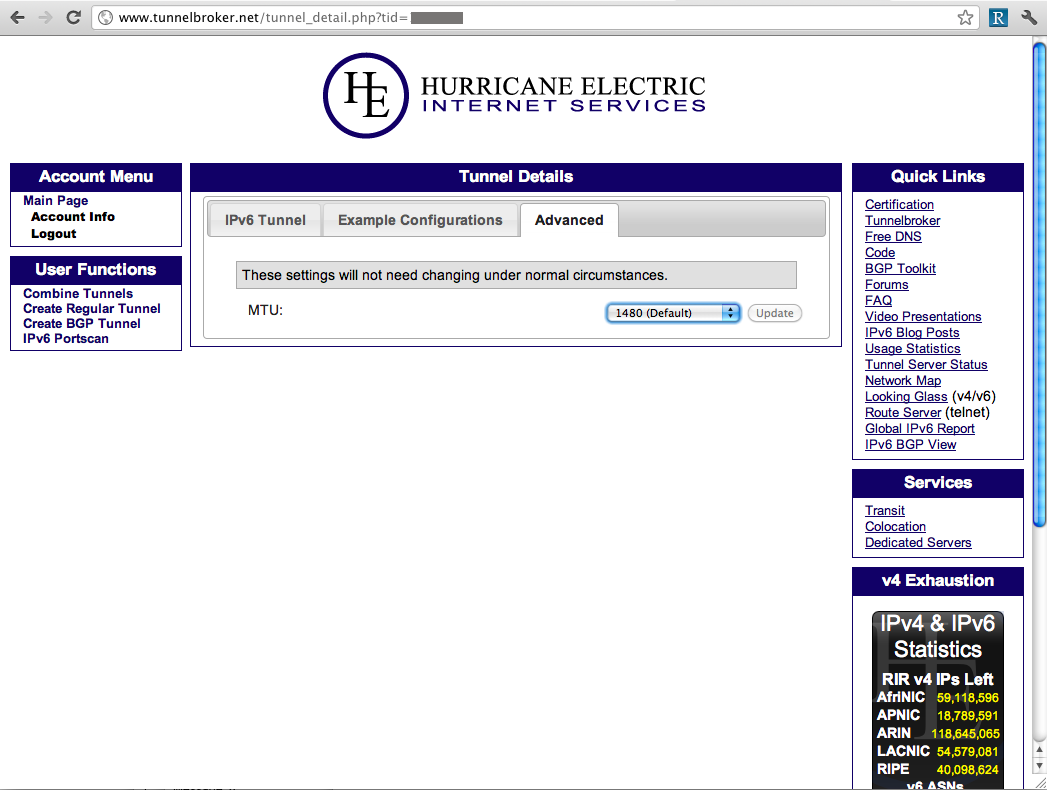
Figure 5: Advanced Settings
Attachments
Cerowrt Project
Recent Updates
Find us elsewhere
#bufferbloat on Twitter
Google+ group
Archived Bufferbloat pages from the Wayback Machine
Sponsors
Comcast Research Innovation FundNlnet Foundation
Shuttleworth Foundation
GoFundMe
Bufferbloat Related Projects
OpenWrt ProjectCongestion Control Blog
Flent Network Test Suite
Sqm-Scripts
The Cake shaper
AQMs in BSD
IETF AQM WG
CeroWrt (where it all started)
Network Performance Related Resources
Jim Gettys' Blog - The chairman of the Fjord
Toke's Blog - Karlstad University's work on bloat
Voip Users Conference - Weekly Videoconference mostly about voip
Candelatech - A wifi testing company that "gets it".