Setting up SQM for CeroWrt 3.10
Current versions of CeroWrt have a Smart Queue Management (SQM) tab in the Network section that allows you to optimize the performance of the interface (generally ge00) that connects the CeroWrt router to the Internet. There are three sub-tabs in the SQM tab that you may configure:
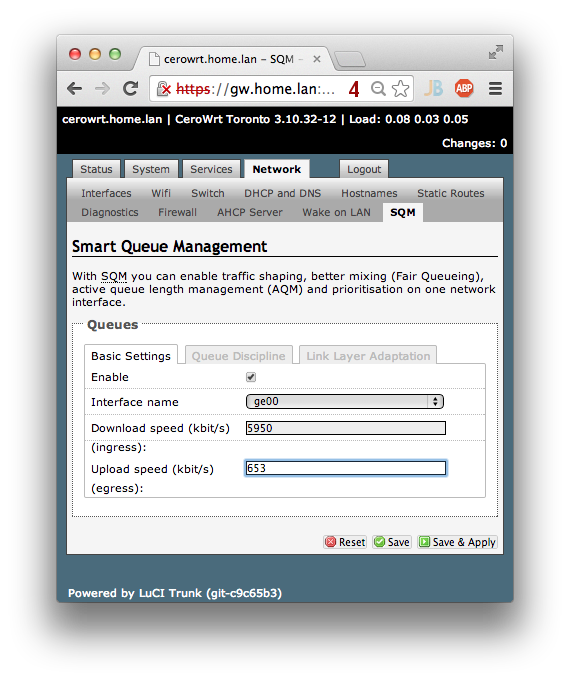
- Basic Settings sets the download and upload speeds of the uplink. Be sure to read about the adjustment you should make when entering speeds.
- Queue Discipline selects which queueing discipline to use on the uplink. The default settings are good in almost every case.
- Link Layer Adaptation lets CeroWrt calculate the proper overheads for links such as DSL and ADSL. If you use any kind of DSL link, you should review this section.
Smart Queue Management (SQM) is our name for an intelligent combination of better packet scheduling (flow queueing) techniques along with with active queue length management (AQM).
Note: CeroWrt has moved away from the term “Active Queue Management” (AQM) because Dave Täht points out that it has pretty much come to be defined as active queue length management and not packet scheduling.
Note to OpenWrt users: Welcome to CeroWrt! These SQM features are now available in both the BB & CC releases. Install the luci-app-sqm and sqm-scripts packages, then use the Network -> SQM QoS menu to get to these screens. (You may have to log out and in to see the new menu.)
- Basic Settings —————–
Set the Download and Upload speeds to be somewhat below the speed of your Internet connection. There are two choices:
- Set the values to 85% of your provider’s published numbers
…or… - If you have done a good speed measurement, set the values to 95% of the measured speed.
Please note these are arbitrary values chosen to give you a good result on the first try. You can increase them later. You are likely to be able to get very close to 100% of the rated upload bandwidth after some twiddling, and 95% of your real bandwidth down, but you need to measure repeatedly to get there.
An example of a tuning session for a common cable modem configuration is here using the RRUL test.
Example 1: If your your provider boasts “7 megabit download/768 kbps upload”, enter numbers that are 85% of those values. 7 megabits-per-second is equal to 7000 kbit/s, 85% of that number is 5950 kbit/s. The proper value for 768 kbps would be 653 kbit/s.
Example 2: If you have measured your bandwidth with http://speedtest.net or other network test tool (disable SQM first), set the upload and download speeds to 95% of those numbers. If you get 6.2 megabits down and 0.67 megabits up (6200 kbps and 670 kbps, respectively), set your down and upload speeds to 95% of those numbers (5890 and 637 kbps, respectively)
Note: 1 Cable modem makers have gamed speedtest thoroughly by using “Speedboost”, which usually gives you an extra 10 mbits or so for the first 10 seconds (so speedtest will look good). Use a longer test than that for cable. For example, you can expect a cable modem showing 30Mbit down for a speedtest to actually only do 22Mbit over longer periods.
Note: 2 After doing the speed test, be sure to check the “Enable” box and choose an interface (default is ‘ge00’), otherwise CeroWrt will not do anything to prevent bufferbloat.
Basic Settings - the details…
CeroWrt’s SQM is designed to manage the queues of packets waiting to be sent across the slowest (bottleneck) link, which is usually your connection to the Internet. CeroWrt cannot automatically adapt to network conditions on DSL, cable modems or GPON without any settings. Since the majority of ISP provided configurations for buffering are broken today, you need take control of the bottleneck link away from the ISP and move it into CeroWrt so it can be fixed. You do this by entering link speeds that are a few percent below the actual speeds.
Note: it can be difficult to get an accurate measurement of the link speeds. The speed advertised by your provider is a starting point, but your experience often won’t meet their published specs. If you use the provider’s state speeds, enter 85% of those numbers. (See Example 1 above.)
CeroWrt can do a better job if you use a speed test program or web site like http://speedtest.net to get an estimate of the actual up and download values. Even better tools are netalyzr and rrul, which run for long enough to get more accurate measurements. When you have made the measurements, use 95% of the those speeds. (See Example 2 above.)
Be sure to make your measurement when the network is quiet, and others in your home aren’t generating traffic.
- Queue Discipline ——————-
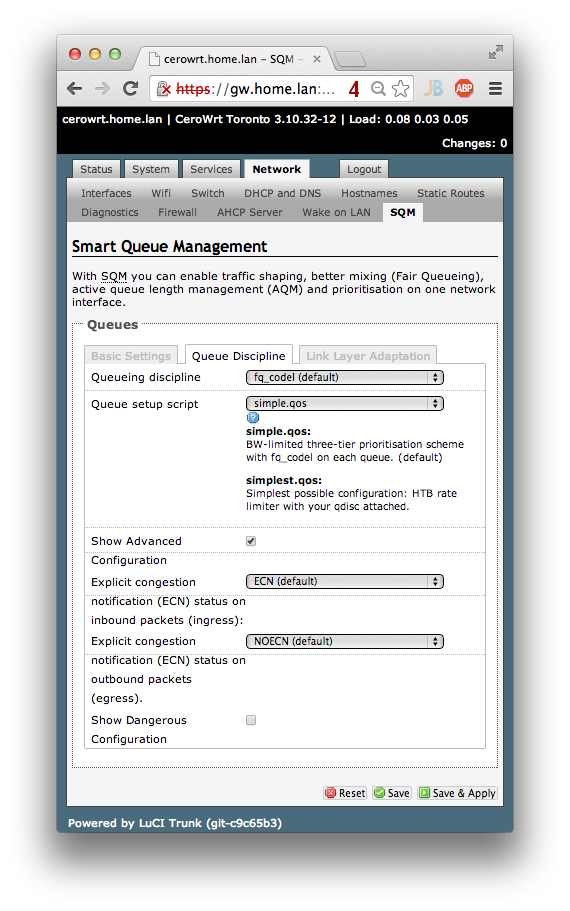
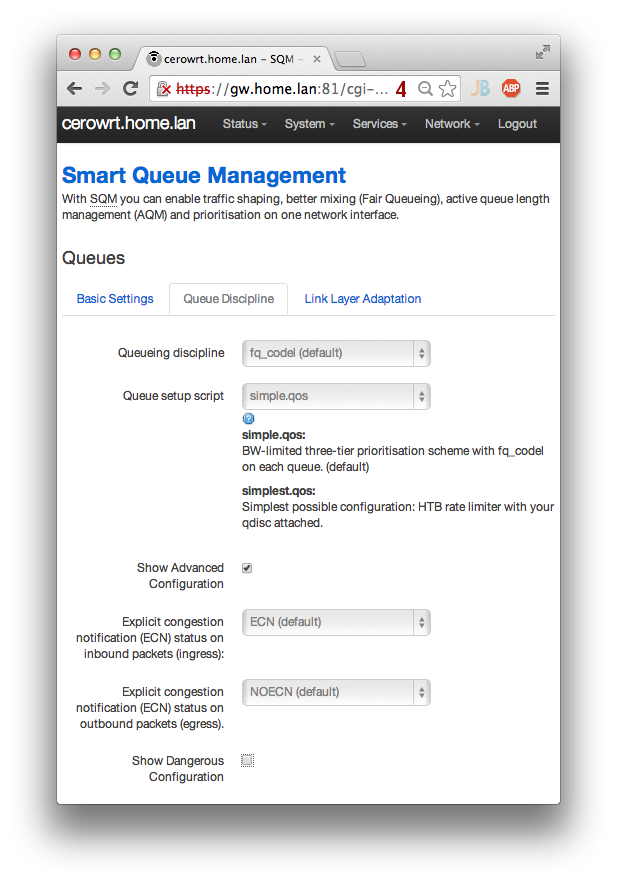
The Queue Discipline tab controls how packets are prioritized for sending and receipt.
Just use the default settings shown here - they work very well for nearly all circumstances. Those defaults are:
- fq_codel queueing discipline
- simple.qos queue setup script
- ECN for inbound packets
- NOECN for outbound packets
If you feel like experimenting, change these settings and let us know the results on the CeroWrt-Devel mailing list
Queueing Discipline - the details…
CeroWrt has been primarily a tool for research into better packet scheduling and AQM technologies. These include CoDel, fq_codel & PIE algorithms that prevent large flows of data (uploads, videos, etc.) from affecting interactive applications like web, videoconferencing, voice, and gaming. One of the technologies (PIE) is now embedded in the DOCSIS 3.1 cable modem standard. If you want to get a feel for how cable modems will work in the future, try pie. (However, we feel the default of fq_codel and the simple.qos script work better in all circumstances).
The simple.qos script has a traffic shaper (the Queueing Discipline you select) and three classes with different priorities for traffic. The simplest.qos has the traffic shaper but just one class for all traffic.
Explicit Congestion Notification (ECN) is a mechanism for notifying a sender that its packets are encountering congestion and that the sender should slow its packet delivery rate. Instead of dropping a packet, CeroWrt marks the packet with a congestion notification and passes it along to the receiver. That receiver sends the congestion notification back to the sender, which can adjust its rate. This provides faster feedback than having CeroWrt drop the received packet. Note: this technique requires that the TCP stack on both sides enable ECN.
At low bandwidths we recommend that you turn ECN off for the Upload (outbound, egress) direction, because fq_codel handles and drops packets before they reach the bottleneck, leaving room for more important packets to get out. For the Download (inbound, ingress) link, we recommend you turn ECN on so that CeroWrt can inform the local receiver (that will in turn notify the remore sender) that it has detected congestion without loss of a packet.
The “Dangerous Configuration” options (not shown in this image) allow you to change other parameters. They are not heavily error checked, so be careful when entering them that they are exactly as specified. These options are available when you check the box. As with other options in this tab, it is safe to leave them at their default. They include:
- Hard limit on ingress queues: This is a limit the ingress (inbound) queues, measured in packets. Leave it empty for default.
- Hard limit on egress queues: This is a limit on the egress (outbound) queues. Similar to the ingress hard limit.
- Latency target for ingress: The codel algorithm specifies a target, expressed in msec. Use “auto” for a calculated compensation for slow links (less than 4 mbps). Leave it empty for the default.
- Latency target for egress: The target setting for the egress queues. Similar to the ingress latency target.
- Advanced option string for ingress: This string passes additional parameters to the ingress queueing discipline. There is no error checking, so enter carefully. Empty is the default.
- Advanced option string for egress: Similar to the ingress advanced option string.
- Link Layer Adaptation ————————
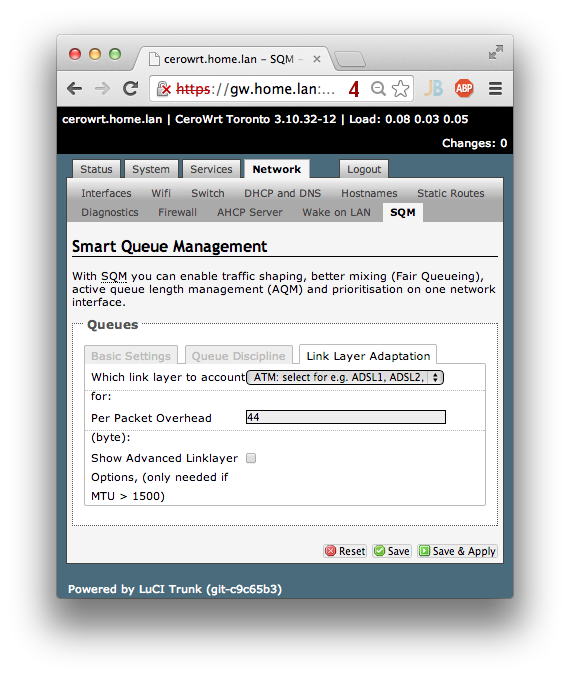
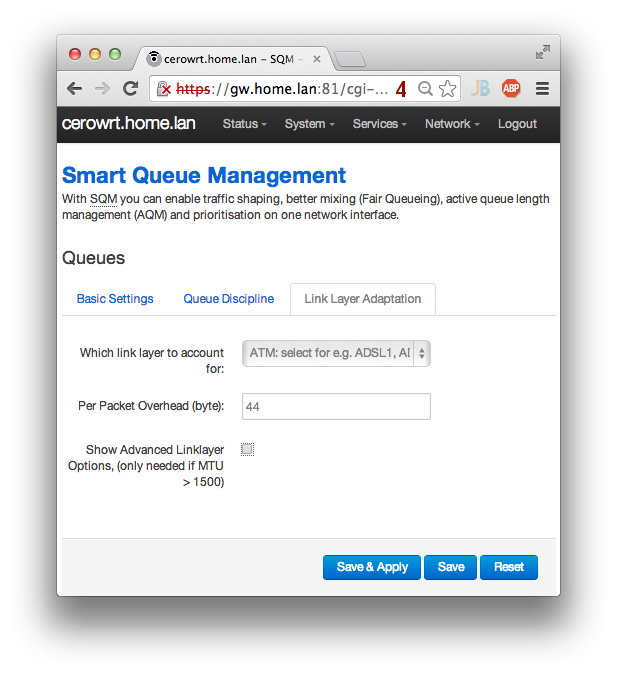
Set the Link Layer Adaptation options based on your connection to the Internet. The general rule for selecting the Link Layer Adaption is:
- Choose the “ATM: select for e.g. ADSL1, ADSL2, ADSL2+.” item with the Per-packet Overhead set to 44 if you use any kind of DSL/ADSL connection to the Internet (that is, if you get your internet service through a telephone line).
- Choose “Ethernet with overhead: select for e.g. VDSL2.” and set the Per-packet Overhead to 8 if you know you have a VDSL2 connection.
- Choose “None (default)” if you use Cable modem, Fiber, direct Ethernet, or another kind of connection to the Internet. All the other parameters will be ignored.
If you are not sure what kind of link you have, first try using “None”, then run one of the Tests for Bufferbloat. If the results are good, you’re done. Next, try the ATM choice, then the Ethernet choice to see which performs best. Read the Details (below) to learn more about tuning the parameters for your link.
Link Layer Adaptation - the details…
It is especially important to set the Link Layer Adaptation on links that use ATM framing (almost all DSL/ADSL links do), because ATM adds five additional bytes of overhead to a 48-byte frame. Unless CeroWrt can account correctly for the ATM framing bytes, short packets will appear to take longer to send than expected, and CeroWrt will penalize that traffic. CeroWrt can also account for the overhead imposed by “Ethernet with overhead” (mostly VDSL) links. Cable Modem, Fiber, and direct Ethernet connections generally do not need any kind of link layer adaptation.
The “Advanced Link Layer” choices are relevant if you are sending packets larger than 1500 bytes. This would be unusual for most home setups, since ISPs generally limit traffic to 1500 byte packets.
Unless you are experimenting, you should use the tc_stab (not the htb_private) choice for the link layer adaptation mechanism.
Conclusion
The Link Layer recommendations above reflect “good enough” settings, and should work quite well for virtually all connections.
You may be able to improve your performance by adjusting the parameters above to the specifics of your connection to the internet through your ISP. If you want to experiment, read Everything you wanted to know about Link Layer Adaptation. And join the CeroWrt-Devel mailing list and let us know what you learn!
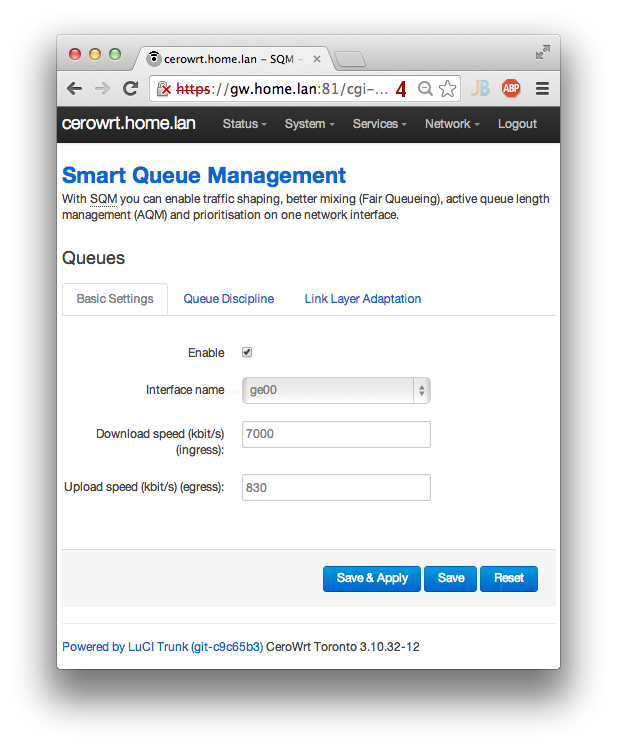
SQM Settings using new Bootstrap theme
CeroWrt 3.10.32 and newer have a new design that uses a clean Bootstrap3 inspired look. You can select it by going to the System tab, clicking the System sub-tab, and finding the Language and Style sub-sub-sub tab. These Web pages are the equivalent of the ones above shown in the Bootstrap design
Attachments
Cerowrt Project
Recent Updates
Find us elsewhere
#bufferbloat on Twitter
Google+ group
Archived Bufferbloat pages from the Wayback Machine
Sponsors
Comcast Research Innovation FundNlnet Foundation
Shuttleworth Foundation
GoFundMe
Bufferbloat Related Projects
OpenWrt ProjectCongestion Control Blog
Flent Network Test Suite
Sqm-Scripts
The Cake shaper
AQMs in BSD
IETF AQM WG
CeroWrt (where it all started)
Network Performance Related Resources
Jim Gettys' Blog - The chairman of the Fjord
Toke's Blog - Karlstad University's work on bloat
Voip Users Conference - Weekly Videoconference mostly about voip
Candelatech - A wifi testing company that "gets it".